Geekman
  • Best BuyTop 5
  • Reviews
  • How to
  • Best Of
  • News
  • Gaming
  • Videos
Search
  • About Us
  • Contact Us
  • Privacy Policy
© 2022 Geekman.in. All Rights Reserved.
Reading: How To Change Default Search Engine In Brave Browser (2023)
Share
Aa
Geekman
Aa
Search
  • Best BuyTop 5
  • Reviews
  • How to
  • Best Of
  • News
  • Gaming
  • Videos
Follow US
  • About Us
  • Contact Us
  • Privacy Policy
© 2022 geekman.in. All Rights Reserved.

Home » How To Change Default Search Engine In Brave Browser (2023)

How-to

How To Change Default Search Engine In Brave Browser (2023)

Last updated: 11/01/2023
By Anjali Bhatt 2.6k Views 1 Min Read
How To Change Default Search Engine In Brave

In June, the privacy-oriented Brave Browser introduced its search engine called Brave Search. And from October, Brave has replaced Google Search with Its Brave Search as the default option for new users in the US, Canada, and the UK. It’s not the first time the company last year replaced Qwant in France and DuckDuckGo in Germany.

If you are uncomfortable with Brave Search, we explain how to change the default search engine in Brave Browser on your desktop and mobile.

Change Default Search Engine In Brave Browser (Windows, Mac, and Linux)

1. Open the Brave Browser and click on the hamburger menu icon (at the top-right corner). From the list, choose ‘Settings.’

Open Brave Browser setting

2. On the setting page, click on the ‘Search engine’ tab and locate the ‘ Search engine used in the address bar ’ option.

Search engine used

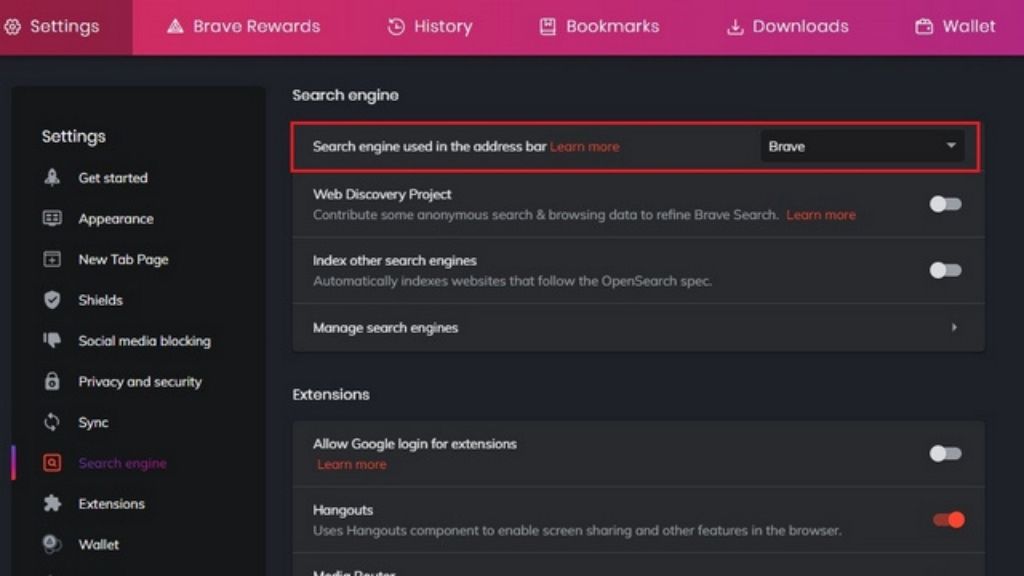
3. Open the dropdown list next to the ‘Search engine used in the address bar’ option and pick the default search engine you want for your Brave Browser. The default options available are Brave Search, Google Search, DuckDuckGo, Qwant, Bing Search, and Startpage. Just select one of these, and your job is done.
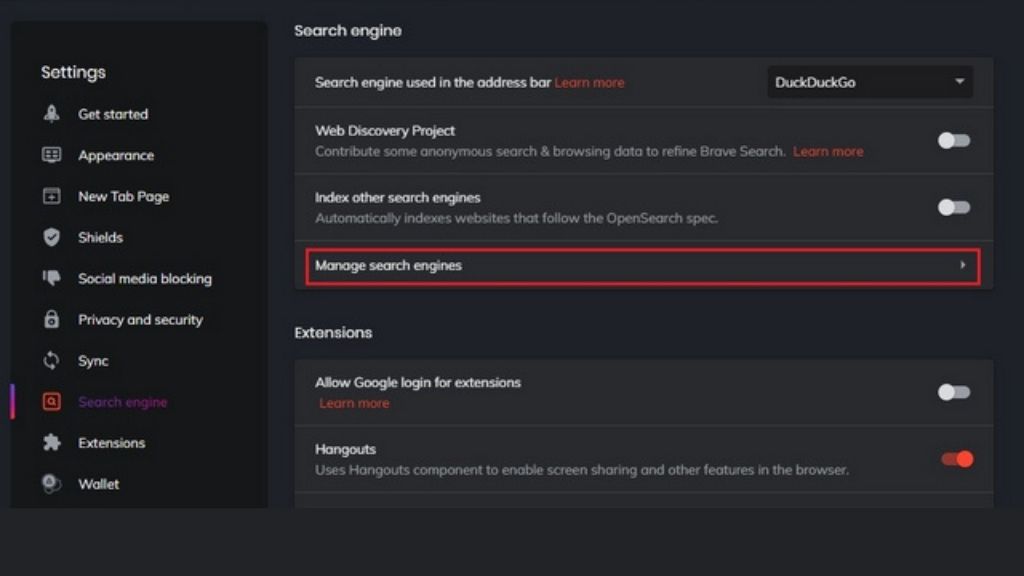
pick the default search engine

4. In case your preferred search engine is not available in the list, don’t worry. You can manually add it. For that, click on ‘Manage search engines.

Manage search engines

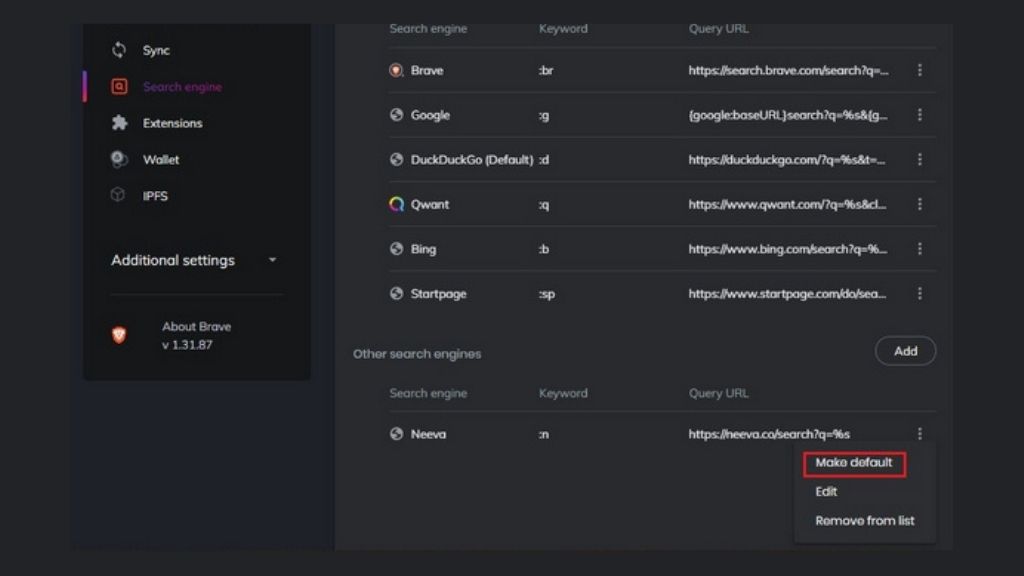
5. On the next page, there is an ‘Add’ button next to the ‘ Other search engines ’ section. Click on that button and proceed further.

Other search engines brave

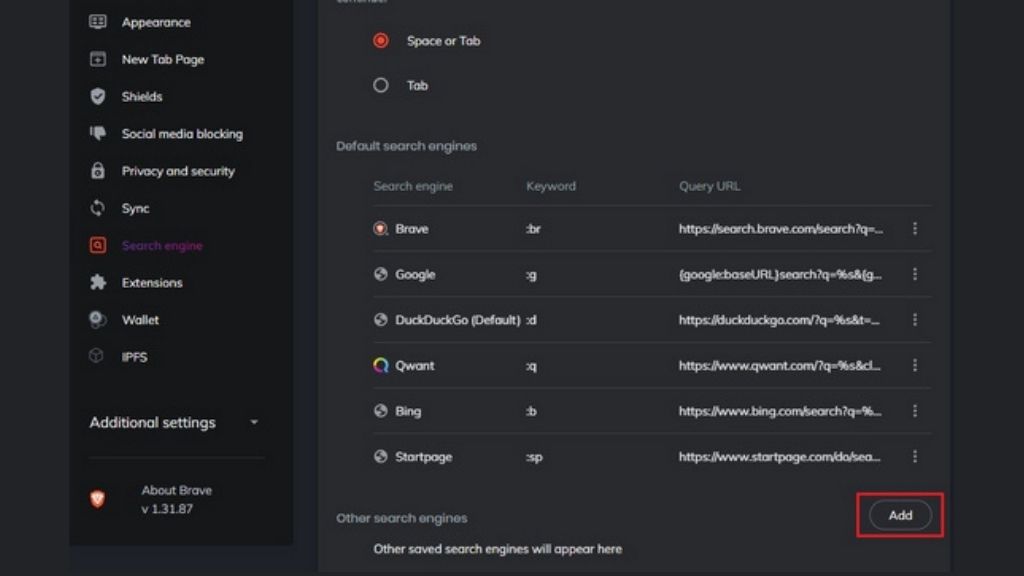
6. After that, the pop-up will appear on your screen, asking you to name the search engine, assign a name for it, and add the URL with %s in place of the query. After filling in the info, click on ‘Add’ to save it.

Custome search engine name brave

7. Now, you can see your manually added search engine under the Other search engines section. Click on the menu and choose ‘Make default’ to set it as your default search engine.

Make default brave search

Change the Default Search Engine In Brave Browser for Android & iOS.
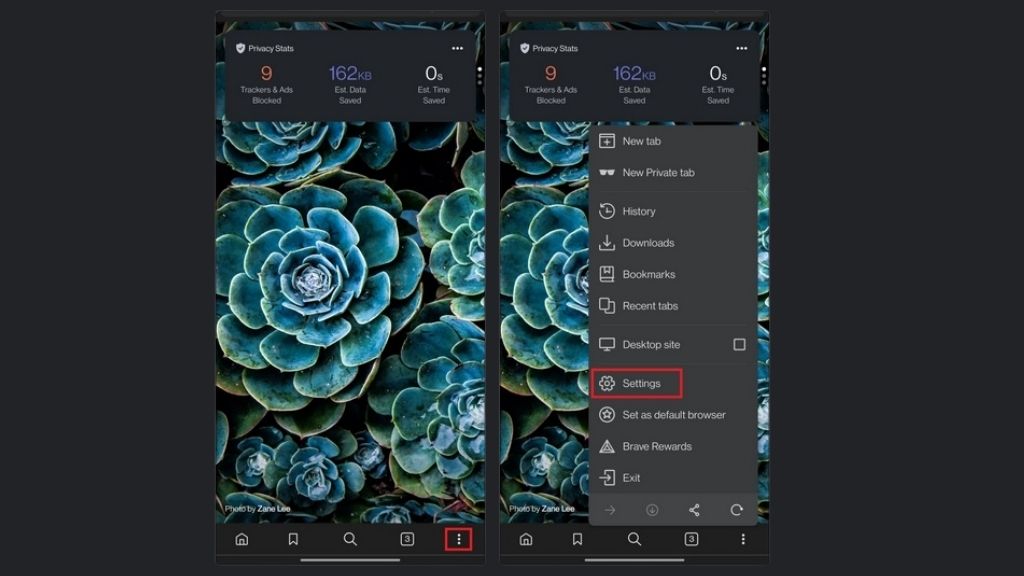
1. Open Brave browser on your android or iPhone and click the vertical three dots menu from the bottom navigation menu. When the menu pop-up appears, choose the ‘Settings’ option.

brave android Setting menu

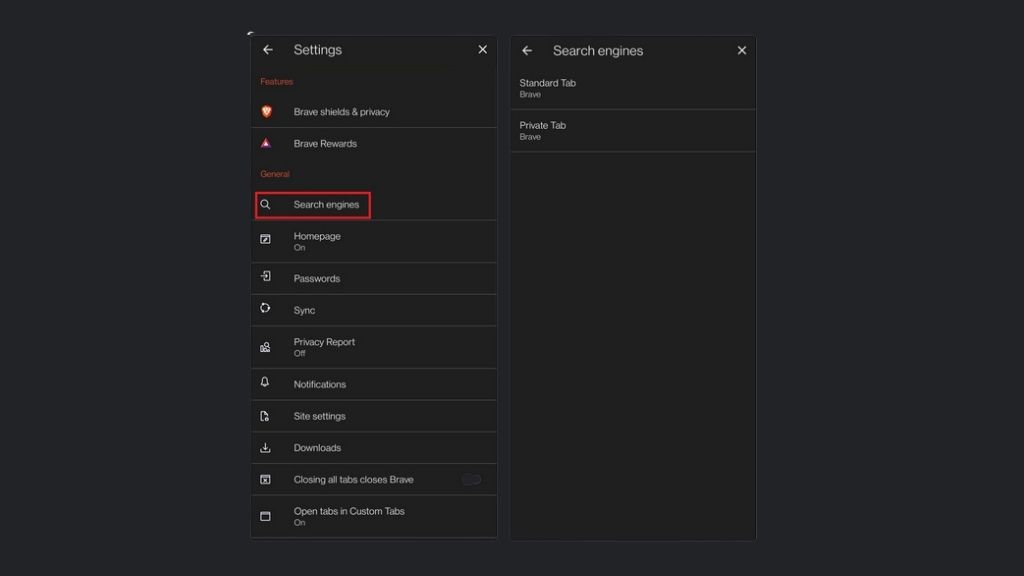
2. Under the settings menu, click on ‘Search engines.’ You can change the default search engine for the standard and private tabs on the next screen.
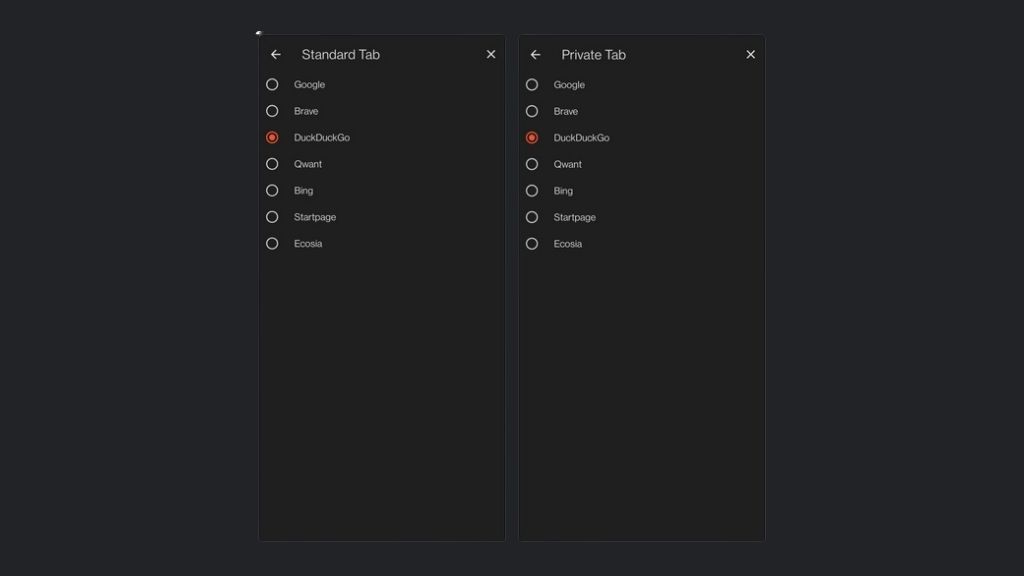
default search engine

3. You can choose your favorite search engine between Google Search, Brave, Bing Search, DuckDuckGo, Qwant, Startpage, and Ecosia for standard and private browsing.

brave mobile search engine
Also Read:
  • How to limit Google Chrome memory usage
  • How To Reduce The Power Consumption Of PC

Share this Article
Facebook Twitter Pinterest Whatsapp Whatsapp LinkedIn Telegram
Share
By Anjali Bhatt
Anjali is an engineering student and also very passionate about new technology. She is a full-time Editor at Geekman. When she's not writing an article, you can find her sleeping, finding something on Netflix, or playing video games.
Leave a comment Leave a comment

Leave a Reply Cancel reply

Your email address will not be published. Required fields are marked *

Follow Us

2.6k Followers Like
2.1k Followers Follow
1k Followers Follow
42k Subscribers Subscribe
Ad imageAd image

You Might also Like

How to reduce PDF file size
How-to

How to reduce PDF file size on Phones, PC, and Mac

2 Min Read
How to Download Twitter Videos
How-to

How to Download Twitter Videos on Phone (Android & iOS) or PC

3 Min Read
How to Get Verified on Twitter
How-to

How to Get Verified on Twitter in 2023 – Full Detail Guide

2 Min Read
How to delete an Instagram Account
How-to

How to delete an Instagram Account Permanently and Temporarily (Android, iPhone, Web)

5 Min Read
Previous Next
Follow US

© 2022 Geekman.in. All Rights Reserved.

  • About Us
  • Contact Us
  • Privacy Policy

Removed from reading list

Undo
Welcome Back!

Sign in to your account

Lost your password?